Saturday, 18 July 2015

Radio button as a cell editor for a column in Table UI element - Part 2

 We have seen creation of radio button in a table column. In case you have missed the part 1 of this tutorial here it is Part 1.

This post is all about how to save that radio buttons data in database table so that next time when one comes back to the application, previously selected radio buttons come selected for the user. Much in tune with the checkboxes thing. Though in general, we use radio button to select one option out of available ones, so in that case there is no need to save that data in database table, but still there are many scenarios where one would like to save the data for further use in some other component.

The idea would be to fill the value of the attribute, which is bind to the selectedKey poperty, in a way that it always holds one single value for the row whose radio button is selected. This coding we will do in the method which we have given for onSelect property of radio button.

So we will take base of the component which we have created in part 1 and we will add one button. On click of that, data will be saved in a database table. Next time when we will open the application, we will get the earlier saved data.

So in main view add one button and assign one method for onAction event.


Create one database table with below fields.

Add below logic in method for onAction event.

Paste below code in WDDOINIT method of the view.


Now go into the properties of radio button and for event onSelect create one mthod TOGGLE_RADIO_BTN. In that method add below lines of code.


Now test the application and also check the content of the database table. You will get the fair idea of the working of the radio buttons.


Happy Learning :)


Wednesday, 1 July 2015

Radio button as a cell editor for a column in Table UI element - Part 1

Having radio button as cell editor of column in Table is more than just binding cell editor as is the case with any other cell editor.

First of all there would be no "RadioButtonGroupByIndex" and "RadioButtonGroupByKey". There would be just "RadioButton" when you will try using radio button as a column. So the question arises here, how we are going to bind radio button in a group so that they behave like in a set and we can select any one of them. Further how we can create more such groups. Two fields in the properties of radio button, hold the answers.

KeyToSelect: It's value varies for every radio button which falles in same group.

SelectedKey: It's value remains same for radio button of a single group. And (most important) is equal to KeyToSelect property of the selected radio button of the group. So, if we allow ourselves to think other way around, how we are gonna decide which row will have radio button selected? By comparing these 2 fields of a row. Simple :)

So in another way, this field is responsible for creating different groups of radio buttons and we can select one radio button per group. I hope I am sounding simple and clear :)

Let's see an exemplary data in a table.


Let's try with some practical stuff..

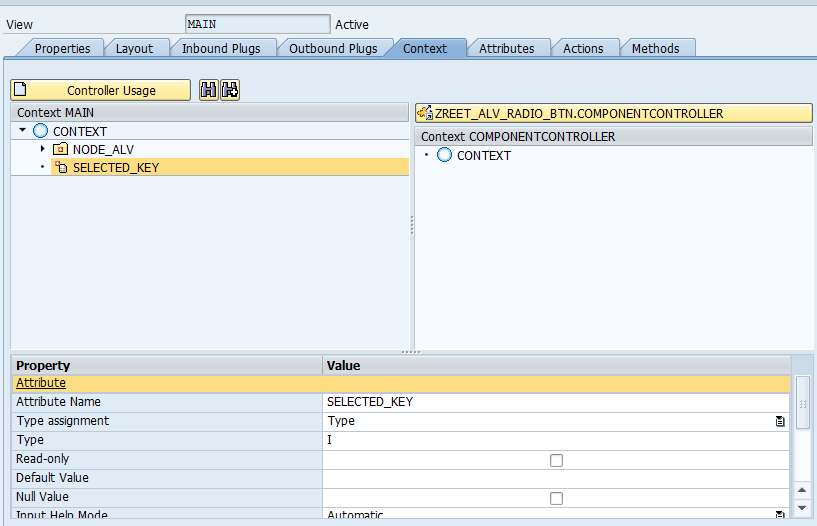
Create one attribute directly under context node and one node with below attribute.

Radio_btn attribute would be of the same type ans selected_key. design layout for Table and bind the properties of radio button like below.

SelectedKey property should be binded to the context attribute which is outside the node, which is bind to the table. This attribute will automatically take the value of Radio_btn attribute once we check the radio button.

In WDDOINIT method write some logic to fill the node which is bind to the table, so that initially some data will be displayed in screen.

Activate the component, make application and test it. Will come liek below screen shots.


Monday, 29 June 2015

Dump (System_name : is not a valid attribute type) in starting the Webdynpro Application

During one of the development, I did some changes and tried testing the application when it started givinig below dump. It was not even going into the first screen.

 ST22  was showing the issue in method _GET_ATTRIBUTE_RTTI of class CL_WDR_CONTEXT_NODE_INFO======CP. Putting break point there was of no help as it was in the middle of one standard code. Somethign was realted to a node's attribute but which node, which attribute and how come it was working till 2 minutes ago?

I quickly revised what exactly I have changed very recently. I was adding a couple of extra fields in a table, and after that it stopped working. I went into component and started checkiing each node throughly and there it was.

That table, where I was adding extra fields, is being used as dictionary structure in one of the node and that node's attribute was coming from that table only. I have not done the "Update Mapping" like below and that was the point.

Once I updated the mapping of that node, my application was running as usual.


Saturday, 13 June 2015

Disable empty rows coming in Webdynpro ALV

We all have came across the disable empty rows that come at the end of ALV. There may be the case that you are getting values only in 2 rows in ALV, but along with that 8 empty rows are coming.


That, at times can be annoying for customer. Here is the solution.

We have to take help of interface IF_SALV_WD_TABLE_SETTINGS. This has methods named SET_DISPLAY_EMPTY_ROWS (Defines Whether Empty Rows Are Displayed). The parameter for this method is of ABAP_BOOL. So we have to pass ABAP_FALSE as the value in order to restrict the disable rows coming into picture. The default value passed to this parameter is ABAP_TRUE, hence disable empty rows.


Class CL_SALV_WD_CONFIG_TABLE uses the interface IF_SALV_WD_TABLE_SETTINGS. We can get the object of this class using the below code snippet in our hook method WDDOMODIFYVIEW.

Now we can test our WD application again.


Friday, 5 June 2015

Default lead selection in ALV in ABAP webdynpro

When we create a ABAP WD application and try to display an ALV, one thing we most commonly see is at the time of display, the first row of ALV comes as selected. This is what we called Default Lead Selection. How we can avoid it ? There can be customer requirement where customer doesn't want to have a default row selected. Below is the answer.

We create nodes in context of Webdynpro component. The properties of that nodes has one attribute named "Initialization Lead selection". That property is responsible for the behaviour explained above. One can check that property and can have default lead selection in ALV/Table or can uncheck it and can avoid the default lead selection. Find below the example.


When we check the “Initialization Lead Selection”


Modify statement going into dump

Weired thinigs happen to you and you are left clueless on the root cause. This happens to me when I was doing routine coding and all ofa sudden Modify statement starts giving dump.


Lots of head scratching finally got to know the reason.

Below is my coding.


The reason is that I was doing loop on one internal table and was trying to upadte the other internal table inside that loop.
The Purpose of MODIFY statement is to modify the internal table content with in the particular loop of the internal table.
The reason for dump is I was trying to modify the unknown internal table directly.
So when I change the coding like in below screen shot, it works.


Deploy ABAP Webdynpro application in SAP Enterprise portal


Requirement: Requirement in one line is to deploy the ABAP webdynpro application in SAP enterprise portal so that any user, who has access to enterprise portal, can access the application.

We achieve this by creating iView (Integrated View) in enterprise portal.

Prerequisite:
  • We need to have an already developed Webdynpro application handy.
  • A connection must be in place between enterprise portal and the ECC server which has your webdynpro application.
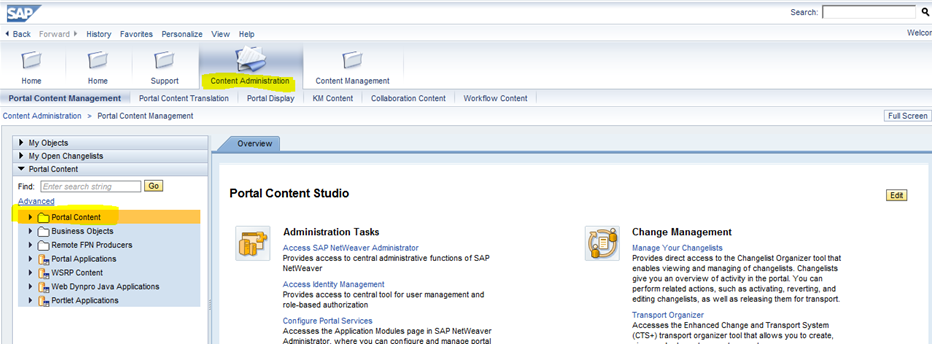
  •  You must have the necessary authorization in enterprise portal so that you can see the tabs, folders shown in below figure.
Now follow the below mentioned steps.


Choose the respective system which has the webdynpro application in “search in” field, give application name in “Search for ” field and click on “Go”.

Select the searched application and click on “start Upload”.

Click on “Finish”.

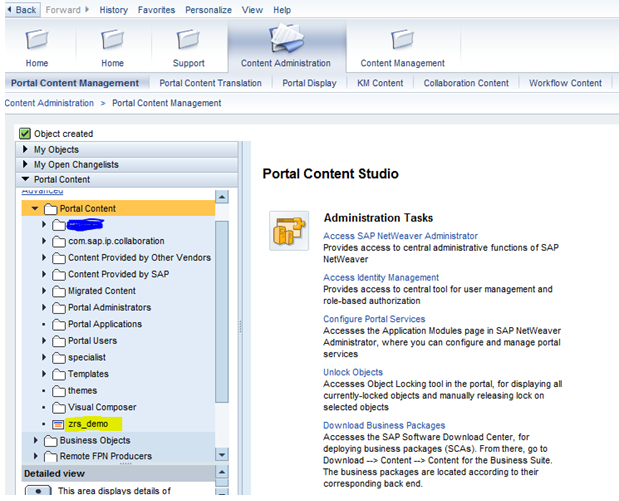
After clicking finish, if you see in left hand side panel in “Portal content”, you can see your iView on last.

Right click on the iView and select properties.


You can see all the properties related to that iView/WD app here.

I got a problem once, when my WD app was not a Z app but it was on some namespace, say /ABC/WD_APP is my WD app. This is not the conventional WD app which starts with Z. In such case we have to search here the “Namespace” property and set our namespace there like below and click on “Save”.
Now test the iView